An opt-in funnel is a powerful way to capture leads, build relationships, and convert prospects into loyal customers. In the world of digital marketing, building an email list is one of the most valuable things you can do. In this comprehensive guide, we’ll dive deep into what an opt-in funnel is, why it’s essential, and how to create one that drives results for your business.
What is an Opt-In Funnel?
An Opt-In Funnel is a series of steps designed to capture a visitor’s contact information, usually an email address, in exchange for a valuable offer (often called a lead magnet). Once the contact information is collected, the user is then nurtured through a series of automated follow-up emails or messages, moving them closer to making a purchase. The goal of an opt-in funnel is to generate leads, build relationships, and eventually convert subscribers into customers.
Opt-in funnels are a fundamental part of email marketing. They help you grow a targeted audience that has shown interest in your products or services. By guiding visitors through a series of value-driven steps, you can turn casual browsers into loyal followers and, ultimately, paying customers.
Why Opt-In Funnels Matter
Opt-in funnels are crucial for businesses of all sizes, especially in a competitive online landscape where building relationships with potential customers is essential. Here are some key benefits of implementing an opt-in funnel:
- Lead Generation: An opt-in funnel helps you capture leads who have shown interest in your offer and are more likely to engage with your brand.
- Increased Engagement: By providing value through emails and other forms of content, you build trust and engagement with your audience.
- Higher Conversion Rates: Leads captured through opt-in funnels are often more likely to convert into paying customers because they have already shown interest.
- Audience Segmentation: Collecting emails allows you to segment your audience based on their interests and behaviors, allowing for targeted messaging.
- Cost-Effective Marketing: Email marketing is one of the most cost-effective ways to reach an audience, making opt-in funnels a budget-friendly option for lead generation.
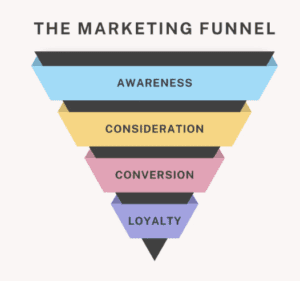
Key Components of an Opt-In Funnel
An effective opt-in funnel has several components, each playing a critical role in capturing and nurturing leads. Here’s a breakdown of each stage:
- Lead Magnet: This is the offer that attracts visitors to enter your funnel. It could be an eBook, checklist, webinar, discount code, or any other valuable content.
- Landing Page: This is the page where the lead magnet is presented, and it includes an opt-in form for visitors to enter their contact information.
- Opt-In Form: This form collects the user’s contact information, typically their name and email address. It should be simple and concise.
- Thank You Page: After the user submits their information, they are redirected to a thank you page confirming their subscription and providing the next steps.
- Welcome Email Sequence: An automated series of emails welcoming the subscriber, delivering the lead magnet, and beginning the relationship-building process.
How to Create a High-Converting Opt-In Funnel
Building an opt-in funnel involves a combination of strategic planning and quality content creation. Follow these steps to create an effective opt-in funnel that captures leads and nurtures them into paying customers.
Step 1: Define Your Target Audience
The first step in creating a successful opt-in funnel is understanding who you’re targeting. Identify your ideal customer by considering their:
- Demographics (age, location, gender, income, etc.)
- Pain points or challenges
- Interests and preferences
By defining your audience, you can create an opt-in offer that resonates with their specific needs and desires.
Step 2: Choose a Compelling Lead Magnet
A lead magnet is the core of your opt-in funnel. To encourage visitors to subscribe, your lead magnet should be valuable, relevant, and easy to consume. Some of the popular lead magnets:
- eBooks or Guides: In-depth content that provides value on a specific topic.
- Checklists: Simple, actionable lists that help your audience accomplish something.
- Webinars or Free Training: Educational sessions on a topic of interest to your audience.
- Discount Codes: An incentive for new subscribers to make their first purchase.
- Free Templates or Tools: Resources that solve a problem or make tasks easier.
Ensure your lead magnet is specific and solves a problem for your audience. The more tailored it is to their needs, the higher your conversion rates will be.
Step 3: Build a Dedicated Landing Page
The landing page is where visitors will decide whether or not to enter your funnel. Here’s what your landing page should include:
- Compelling Headline: Your headline should grab attention and clearly state the benefit of your lead magnet.
- Brief Description: Explain what visitors will get and how it benefits them.
- Call-to-Action (CTA): Use a clear, action-oriented CTA that tells visitors exactly what to do.
- Visuals: Images, graphics, or mockups of your lead magnet can increase interest.
- Minimal Distractions: Remove navigation links and other distractions to keep visitors focused on the opt-in form.
Your landing page is where conversions happen, so it’s worth spending time to make it as effective as possible.
Step 4: Design a Simple Opt-In Form
The opt-in form is where visitors provide their information. To maximize conversions, keep it simple:
- Limit Fields: The fewer fields you require, the more likely people are to complete the form. Stick to essential information like name and email.
- Highlight Privacy: Assure users that their information is secure and won’t be shared.
- CTA Button Text: Use text that’s clear and encourages action, like “Get My Free Guide” instead of “Submit.”
Step 5: Create a Thank You Page
Once a visitor subscribes, redirect them to a thank you page. This page serves several purposes:
- Acknowledge the Signup: Thank subscribers for joining and let them know what to expect.
- Confirm Lead Magnet Delivery: Explain how they’ll receive the lead magnet, whether it’s available for download immediately or sent via email.
- Encourage Further Engagement: Suggest additional actions, like following you on social media, checking out your blog, or sharing the offer with friends.
Step 6: Set Up a Welcome Email Sequence
The welcome email sequence is an automated series of emails that nurtures new subscribers. This is a critical part of the funnel because it builds trust and keeps your brand top-of-mind. Here’s a typical sequence:
- Welcome Email: Thank them for subscribing, deliver the lead magnet, and introduce your brand.
- Value Email: Share additional resources, tips, or valuable information relevant to their interests.
- Social Proof Email: Highlight customer testimonials, case studies, or reviews to build credibility.
- Soft Sales Email: Introduce your product or service subtly, emphasizing how it solves their problems.
- Offer or CTA Email: Encourage them to take action, like booking a call, trying a demo, or making a purchase.
Each email should build on the previous one, moving subscribers closer to a purchase decision.
Step 7: Track and Optimize Your Opt-In Funnel
To ensure your funnel is performing optimally, track key metrics like:
- Landing Page Conversion Rate: The percentage of visitors who sign up on your landing page.
- Email Open Rates: The percentage of subscribers who open your emails.
- Click-Through Rates (CTR): The percentage of subscribers who click links within your emails.
- Conversion Rate: The percentage of leads who eventually make a purchase.
Use this data to identify areas for improvement. For example, if your open rates are low, try A/B testing different subject lines. If your landing page isn’t converting, adjust the headline, CTA, or design elements.
