Creating a sales funnel involves designing a step-by-step process that guides potential customers from the initial stage of awareness to the final stage of making a purchase. Here’s a guide to building an effective sales funnel:

1. Understand Your Target Audience
-
Identify your ideal customer.
-
Understand their pain points, needs, and goals.
-
Research where they spend time online and how they prefer to engage with businesses.
2. Define Your Sales Funnel Stages
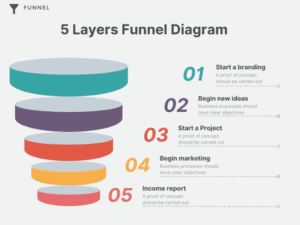
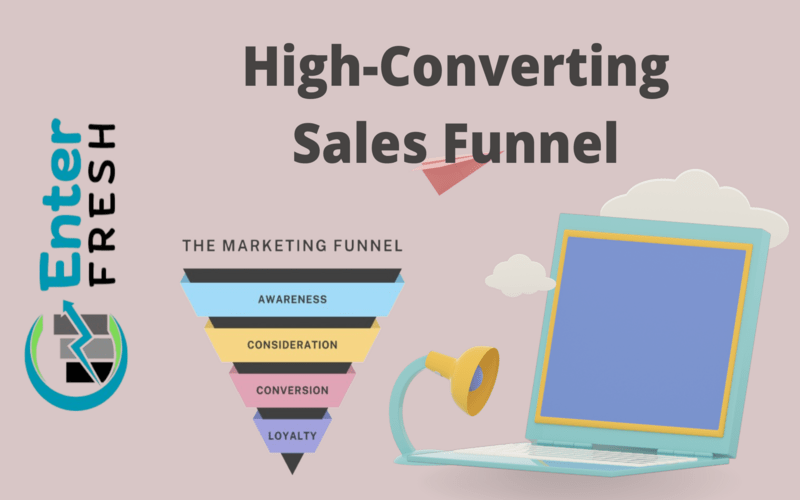
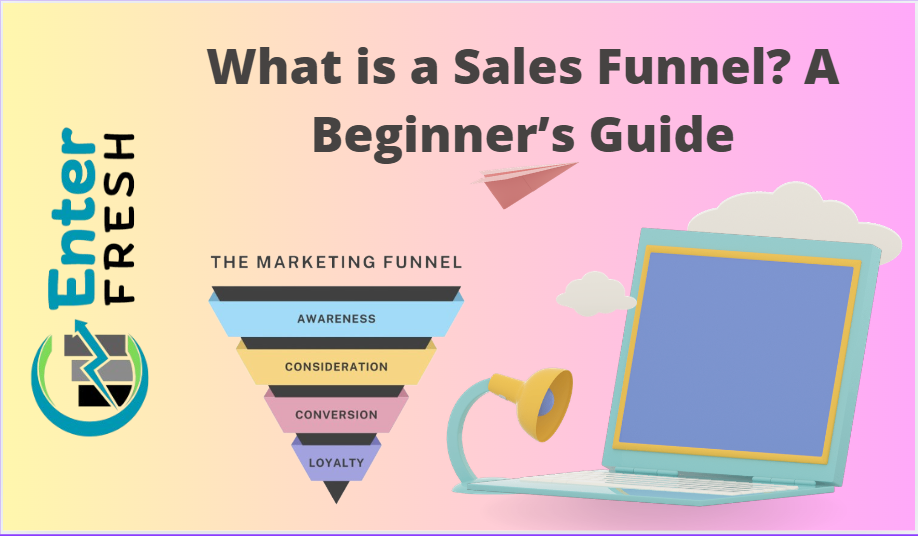
A typical sales funnel includes:
-
Awareness: Attract potential customers.
-
Interest: Provide value and engage them.
-
Decision: Offer solutions and build trust.
-
Action: Convert leads into paying customers.
3. Create an Attractive Lead Magnet
-
Offer something of value to attract your target audience (e.g., free e-books, webinars, discounts).
-
Make the lead magnet relevant and irresistible.
4. Build a Landing Page
-
Design a clean and focused landing page for your lead magnet.
-
Include a compelling headline, a brief description, and a clear call-to-action (CTA).
-
Optimize the page for mobile devices.
5. Drive Traffic to Your Funnel
-
Use marketing strategies such as:
-
Social media ads (Facebook, Instagram, LinkedIn, etc.).
-
Search engine optimization (SEO).
-
Email marketing.
-
Influencer marketing.
-
Content marketing (blogs, videos, podcasts).
-
6. Engage and Nurture Leads
-
Use email marketing or retargeting ads to maintain communication.
-
Share helpful content, success stories, and case studies.
-
Build trust by addressing objections and showcasing your expertise.
7. Optimize the Sales Process
-
Use persuasive offers to encourage conversions (e.g., limited-time discounts, free trials).
-
Provide testimonials, reviews, and an FAQ section to overcome doubts.
-
Ensure the checkout process is seamless and straightforward.
8. Track and Analyze Performance
-
Use analytics tools to monitor conversion rates and user behavior at each stage.
-
Identify bottlenecks and areas for improvement.
-
Run A/B tests on landing pages, CTAs, and email campaigns.
9. Automate the Funnel
-
Use CRM tools and marketing automation platforms to streamline processes.
-
Set up automatic email sequences and retargeting campaigns.
10. Refine and Repeat
-
Continuously gather feedback and adjust your funnel to improve performance.
-
Experiment with different strategies and approaches.
Tools and Platforms to Consider:
-
Landing Pages: ClickFunnels, Unbounce, Leadpages.
-
Email Marketing: Mailchimp, ActiveCampaign, ConvertKit.
-
Analytics: Google Analytics, HubSpot, Hotjar.
-
CRM: Salesforce, Zoho CRM, Pipedrive.
Using WordPress to create a sales funnel is a powerful and cost-effective approach. Here’s how to set up a sales funnel with WordPress:

Step 1: Choose a WordPress Funnel Plugin
Several plugins can help you build a sales funnel within WordPress:
-
CartFlows: This is designed specifically for creating sales funnels.
-
Elementor Pro: A drag-and-drop builder that integrates with WooCommerce.
-
WooFunnels: This is Perfect for WooCommerce users.
-
Thrive Architect: Focuses on lead generation and sales pages.
Install and activate your chosen plugin to get started.
Step 2: Set Up Your Funnel Pages
A typical sales funnel involves several key pages:
-
Landing Page:
-
Use a clean, professional design.
-
Include a clear headline, benefit-driven content, and a strong call-to-action (CTA).
-
Plugins like Elementor or Thrive Architect offer templates for landing pages.
-
-
Lead Capture Page:
-
Integrate a form to collect visitor information (e.g., email addresses).
-
Use plugins like WPForms, Contact Form 7, or Gravity Forms to create forms.
-
Consider offering a lead magnet to incentivize sign-ups.
-
-
Sales Page:
-
Highlight your product/service benefits and features.
-
Add testimonials, social proof, and a compelling CTA.
-
Ensure it integrates with your e-commerce platform (e.g., WooCommerce).
-
-
Checkout Page:
-
Simplify the process and make it user-friendly.
-
WooCommerce or CartFlows can optimize your checkout experience.
-
-
Thank You Page:
-
Confirm the transaction.
-
Offer upsells, cross-sells, or links to other resources.
-
Step 3: Integrate Email Marketing
-
Use email marketing services like Mailchimp, ConvertKit, or ActiveCampaign.
-
Install and configure WordPress plugins to connect your forms with your email platform (e.g., Mailchimp for WordPress).
-
Set up automated email sequences to nurture leads and encourage conversions.
Step 4: Drive Traffic to Your Funnel
-
SEO: Use the Yoast SEO or Rank Math plugin to optimize your pages for search engines.
-
Social Media: Share your funnel’s landing page link on platforms like Facebook, Instagram, or LinkedIn.
-
Ads: Run Google Ads or social media ads targeting your ideal audience.
-
Content Marketing: Use blog posts to drive organic traffic to your funnel.
Step 5: Analyze and Optimize
-
Analytics Tools: Install Google Analytics or use a plugin like MonsterInsights to track visitor behavior and conversion rates.
-
A/B Testing: Experiment with different headlines, CTAs, and designs using tools like Elementor’s split-testing feature.
-
Feedback: Collect user feedback to identify areas for improvement.
Suggested Plugins and Themes:
-
Themes:
-
Astra (lightweight and fast).
-
Divi (highly customizable).
-
GeneratePress (great for speed and performance).
-
-
Funnel-Specific Plugins:
-
CartFlows.
-
Elementor Pro.
-
WooFunnels.
-
OptimizePress.
-
-
Form Plugins:
-
WPForms.
-
Gravity Forms.
-
Contact Form 7.
-
Using FunnelKit and Elementor together is an excellent choice for creating a high-converting sales funnel in WordPress. FunnelKit (formerly WooFunnels) simplifies the funnel-building process and integrates seamlessly with Elementor for custom designs. Here’s how you can build a sales funnel step by step:
Step 1: Install and Set Up FunnelKit
-
Install FunnelKit:
-
Go to your WordPress dashboard.
-
Navigate to Plugins > Add New, search for “FunnelKit,” and install it.
-
Activate the plugin.
-
-
Upgrade for Advanced Features (Optional):
-
If you need advanced features like upsells, downsells, and order bumps, consider upgrading to FunnelKit Pro.
-
Step 2: Install Elementor
-
Install Elementor:
-
Navigate to Plugins > Add New, search for “Elementor,” and install it.
-
Activate Elementor.
-
-
Upgrade to Elementor Pro (Optional):
-
If you want advanced widgets and templates, consider upgrading to Elementor Pro.
-
Step 3: Create a Sales Funnel with FunnelKit
-
Launch FunnelKit:
-
Go to FunnelKit > Funnels in your WordPress dashboard.
-
Click Add New Funnel.
-
-
Select a Funnel Type:
-
Choose from options like a Lead Generation Funnel, Sales Funnel, or Thank You Funnel.
-
Select a pre-built template or start from scratch.
-
-
Customize Funnel Steps:
-
Add and arrange funnel steps like a Landing Page, Opt-In Page, Checkout Page, and Thank You Page.
-
Assign each page to a specific purpose (e.g., lead generation or sales).
-
Step 4: Design Funnel Pages with Elementor
-
Edit Pages in Elementor:
-
On each funnel step in FunnelKit, click Edit with Elementor.
-
Use Elementor’s drag-and-drop interface to customize the design.
-
Add widgets like headings, buttons, images, forms, and videos to enhance the page.
-
-
Optimize for Conversions:
-
Use compelling headlines and CTAs.
-
Add social proof (testimonials, reviews).
-
Ensure mobile responsiveness.
-
Step 5: Add Forms and Integrations
-
Lead Capture Forms:
-
Use FunnelKit’s form integration or Elementor’s form widget to collect user details.
-
Connect forms to your email marketing platform (e.g., Mailchimp, ActiveCampaign).
-
-
Payment Integration:
-
If you’re selling products, integrate with WooCommerce.
-
FunnelKit supports payment gateways like Stripe, PayPal, and Razorpay.
-
Step 6: Set Up Order Bumps and Upsells (FunnelKit Pro)
-
Order Bumps:
-
Enable order bumps on the checkout page.
-
Offer complementary products or services.
-
-
Upsells/Downsells:
-
Add upsell pages to encourage customers to purchase higher-value items.
-
Add downsell pages to provide lower-cost alternatives if the upsell is declined.
-
Step 7: Test and Optimize
-
Test the Funnel:
-
Walk through the entire funnel to ensure smooth functionality.
-
Test form submissions, payment processes, and email integrations.
-
-
Track Performance:
-
Use FunnelKit’s analytics or integrate with Google Analytics to track conversions.
-
A/B test pages with Elementor’s split-testing feature.
-
-
Optimize:
-
Improve weak spots based on performance data (e.g., bounce rates, drop-offs).
-
Refine design and content to increase engagement.
-
Tips for Success
-
Choose Templates Wisely: Use FunnelKit’s pre-built templates to save time.
-
Leverage Elementor Pro Widgets: Add features like countdown timers, animated headlines, and pop-ups to boost urgency and engagement.
-
Focus on Speed: Use lightweight themes like Astra or GeneratePress for better performance.


